Install the agent
The agent is the heart of the system: it is responsible for feeding all the information from your VPS directly into the NCC — the status of AstraBot, screenshots, machine resources, and automatic restart in the event of a crash.
1. Register the VPS with the NCC
Open the NCC and go to ‘Add a VPS’.
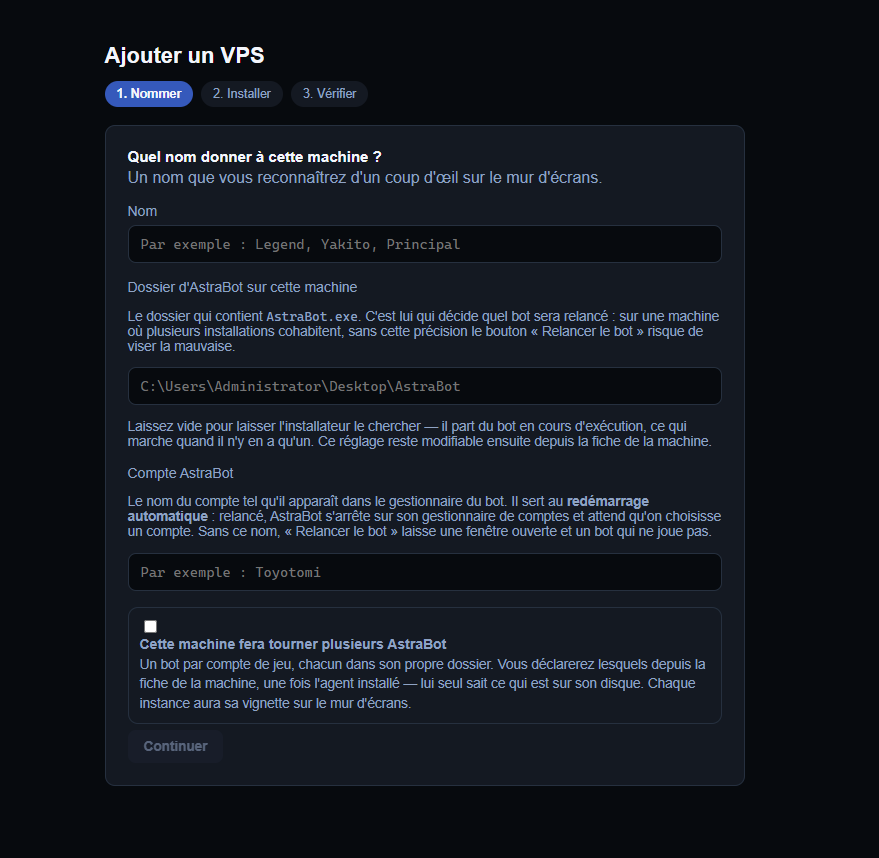
There are three fields to complete:
| Field | Please specify |
|---|---|
| Surname | A name that allows you to identify this VPS at a glance on the wall of screens. |
| Astra File | The exact path to the AstraBot folder on the VPS. This is what enables the agent to restart AstraBot automatically after a crash. |
| Account AstraBot | Your account name is DarkOrbit, written exactly as it appears in AstraBot. The bot uses this to select the correct account when restarting. |
Note
If this VPS is running several AstraBot, tick ‘This machine will run several AstraBot’ — and don’t forget the proxies on your VPS.
2. Install the agent on the VPS
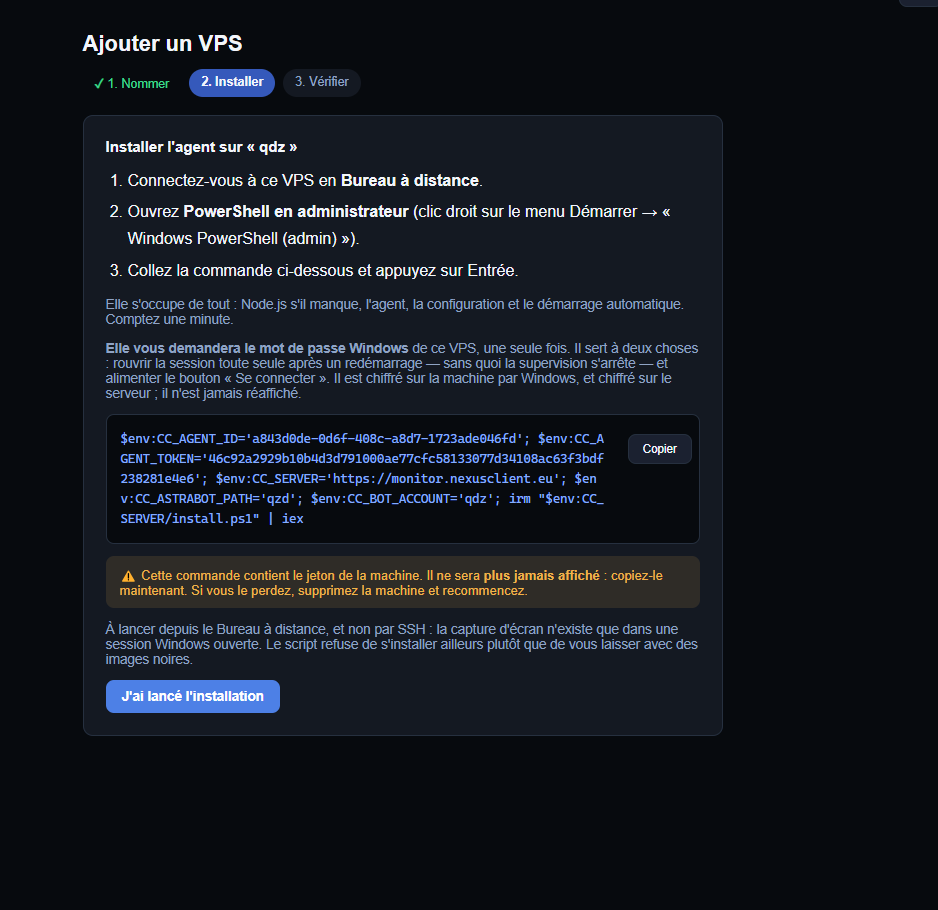
- Log in to your VPS.
- Open PowerShell as an administrator.
- Copy and paste the command shown in the NCC, then confirm.
Important
During installation, the agent will ask you twice for the VPS password. This allows the NCC to let the people you designate log in via RDP** without ever knowing this password**. It is encrypted on the server: there is no risk.
3. Check
Once the installation is complete, click on ‘I have started the installation’. The VPS will appear on your dashboard within a few minutes.
Astuce
It hasn’t appeared after five minutes? Check that the command has been run as an administrator and that the VPS has internet access, then run it again: the installation will resume without causing any issues.